

 Palworld
You've already spent dozens of hours in solo mode building your base, filling your Palbox and turning a nice beach into a frankly questionable industrial zone, but you'd like to level up?
You may have heard that transferring a Palworld save from Windows to a Linux server could quickly become a nightmare: imported world, missing characters, players starting from scratch... not exactly the dream.
At nitroserv, we thought of you: we developed an exclusive tool to let you import your Palworld save to your nitroserv server. So you can go from a solo or P2P save to an adventure with your friends, available 24/7, while keeping all your progression!
On Palworld, people often talk about "importing a map", but the game actually saves an entire world: explored terrain, bases, chests, guilds, Pals and characters.
Quick summary
To import your Palworld save:
- open your server from the nitroserv Manager;
- start your server and leave it running;
- click on the Map Import tab;
- Click on
"Choose a zip"if you have an already archived export, or"Choose a folder"to directly select your Steam save folder; - let the tool analyze your save;
- connect to the server to create characters to associate;
- associate old characters with new ones;
- launch the conversion;
- reconnect once the server has restarted.
Keep in mind:
- For a standard Steam save on Windows, the folder to open is
%LOCALAPPDATA%\Pal\Saved\SaveGames\ - Keep your server running during character preparation and association. The tool will then handle stopping it, importing the save, and restarting it automatically.
- We designed our Palworld import tool to retrieve your world, bases, chests, Pals of course, guilds, characters, and progression linked to your save. It's capable of importing a Palworld save whether it comes from a solo Steam game, coop/P2P, an old dedicated server or even another host!
- After import, remember to check your server configuration from the nitroserv Manager: server name, password, crossplay, XP rate, incubation, PvP, difficulty, etc.
Regarding consoles
Console saves cannot, at this time, be imported directly to a Palworld dedicated server. On Xbox and PS5, saves are managed by the console and cloud, but world files are not accessible like on PC.
To import a save, you must start from a PC save, ideally Steam, or possibly PC Game Pass / Microsoft Store in some cases.
Step 1: Open Map Import
From the nitroserv Manager:
- open your Palworld server;
- start it if it's not already running, and leave it on;
- open the Map Import tab.
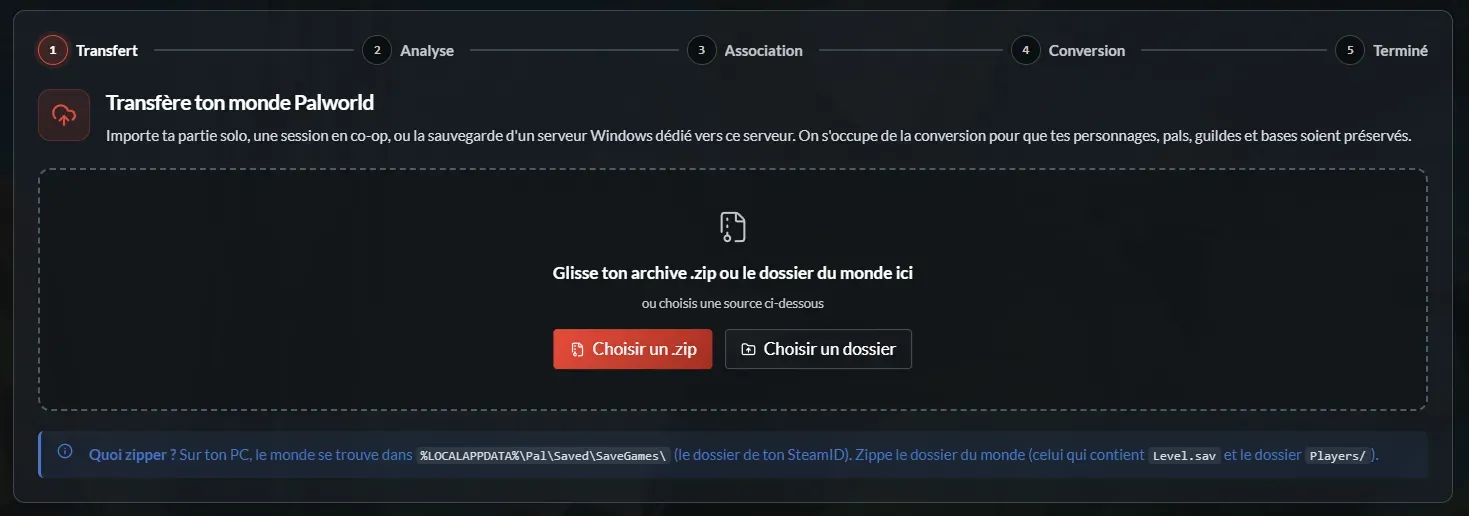
You'll arrive at the Palworld dedicated import tool:
Step 2: Choose your ZIP or save folder
Two options are available:
If you want to import a standard Steam save
If your save comes from Steam on Windows, click on Choose a folder instead.
In the window that opens, paste this path: %LOCALAPPDATA%\Pal\Saved\SaveGames\
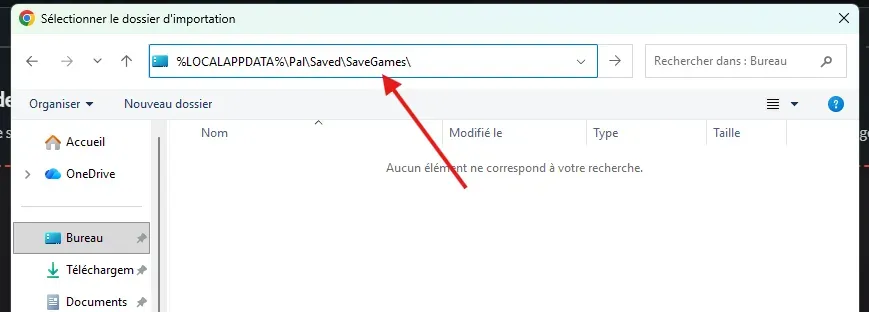
You'll then see one or more folders, corresponding to Steam IDs.
Select the folder for your SteamID by clicking on it once, then click Import.
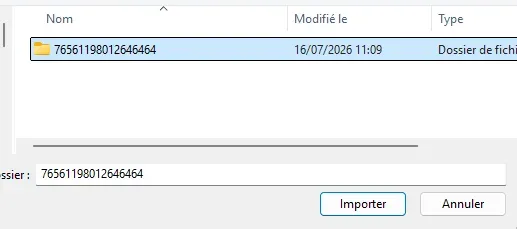
Important: don't go into the folder itself. For a standard Steam save, the tool expects the complete SteamID folder and handles the rest.
If you already have a ZIP archive
If your save is already compressed:
- click on
Choose a zip; - select your .zip file;
- click on Open
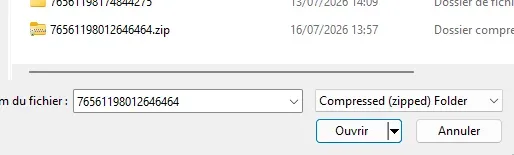
This method is useful if your save comes from an old server, another host, or if you've already prepared it manually.
Step 3: Let the tool analyze the save
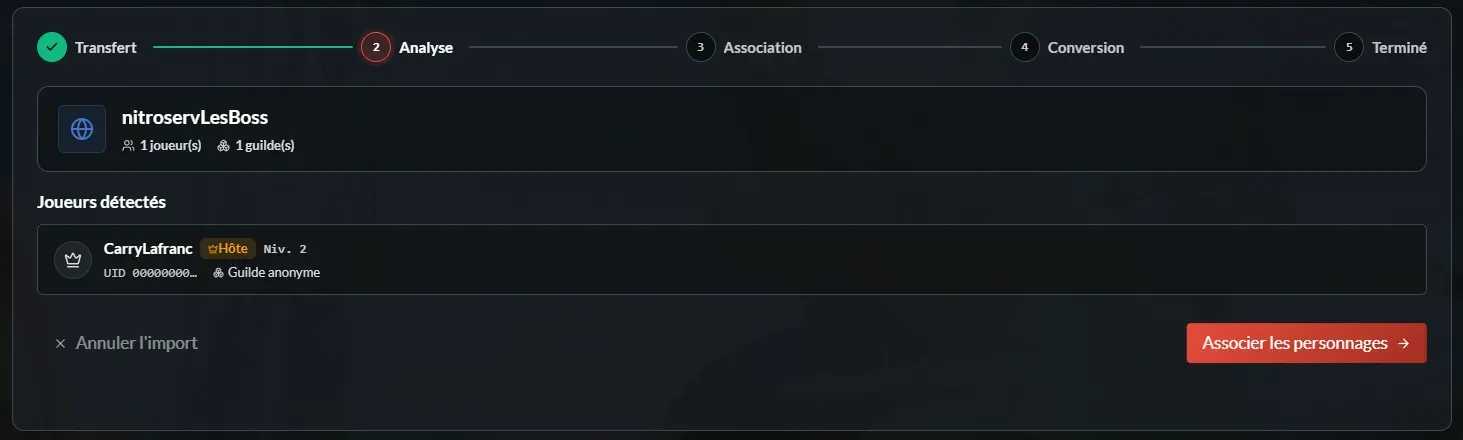
Once the folder or ZIP is selected, the tool analyzes your save: it checks that the necessary files are present, then prepares the import. Next step: associate the characters!
Step 4: Connect to the server
When the analysis is complete, the tool asks you to associate characters from your old save with characters created on your nitroserv server.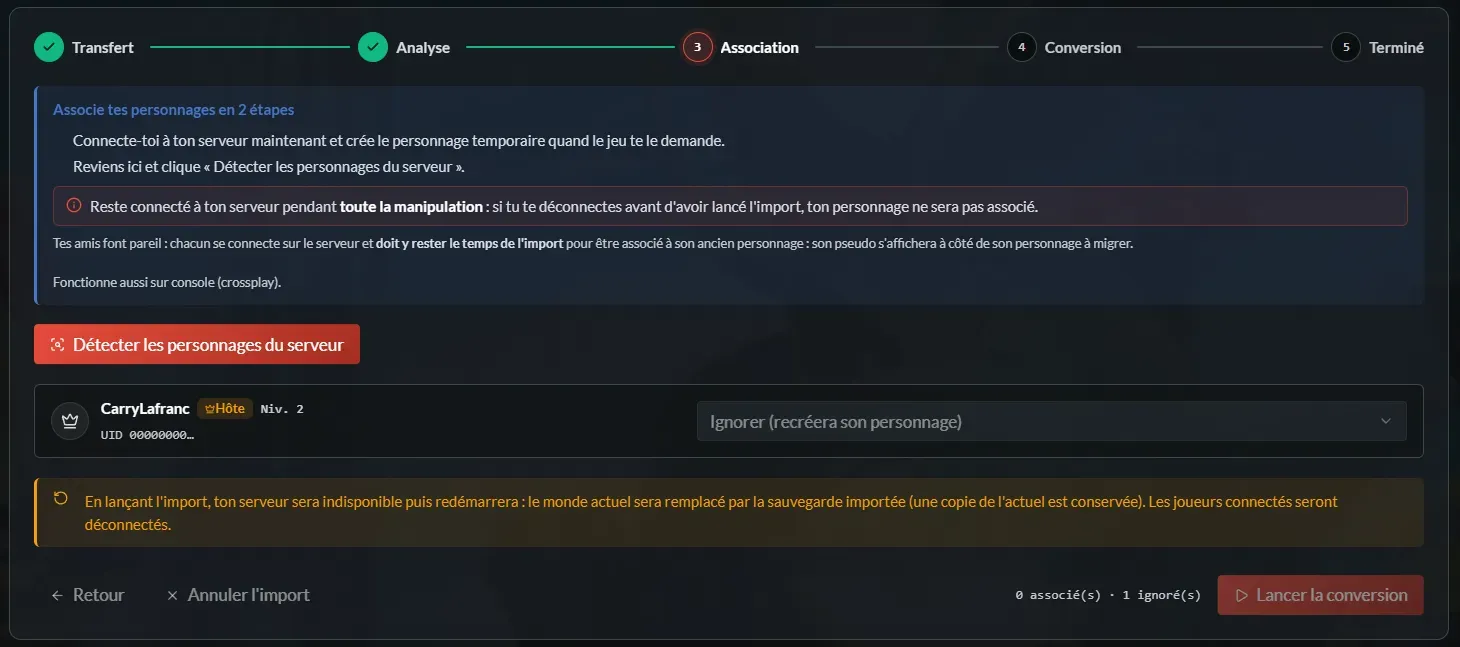
To do this, you need to connect to the server in-game. If you don't know how to join your Palworld server, we've prepared a dedicated guide:
Join your Palworld server on PC or console
Once connected, Palworld will have you create a new character on the server.
Don't worry: this character mainly serves to link with the one from your old save.
Why do you need to associate characters?
When you move from a solo or coop save to a dedicated server, Palworld doesn't always recognize players in exactly the same way.
To avoid losing your character, the nitroserv tool asks you to connect to the server during import.
It detects the new character created on the server, then lets you associate it with the character from your old save.
In short: you tell the tool "this new player on the server is the old player from my save".
It's this association that allows you to properly recover the character's progression.
Step 5: Detect and associate characters
Once connected to the server:
- go back to the import tool in the nitroserv Manager;
- click on Detect server characters;
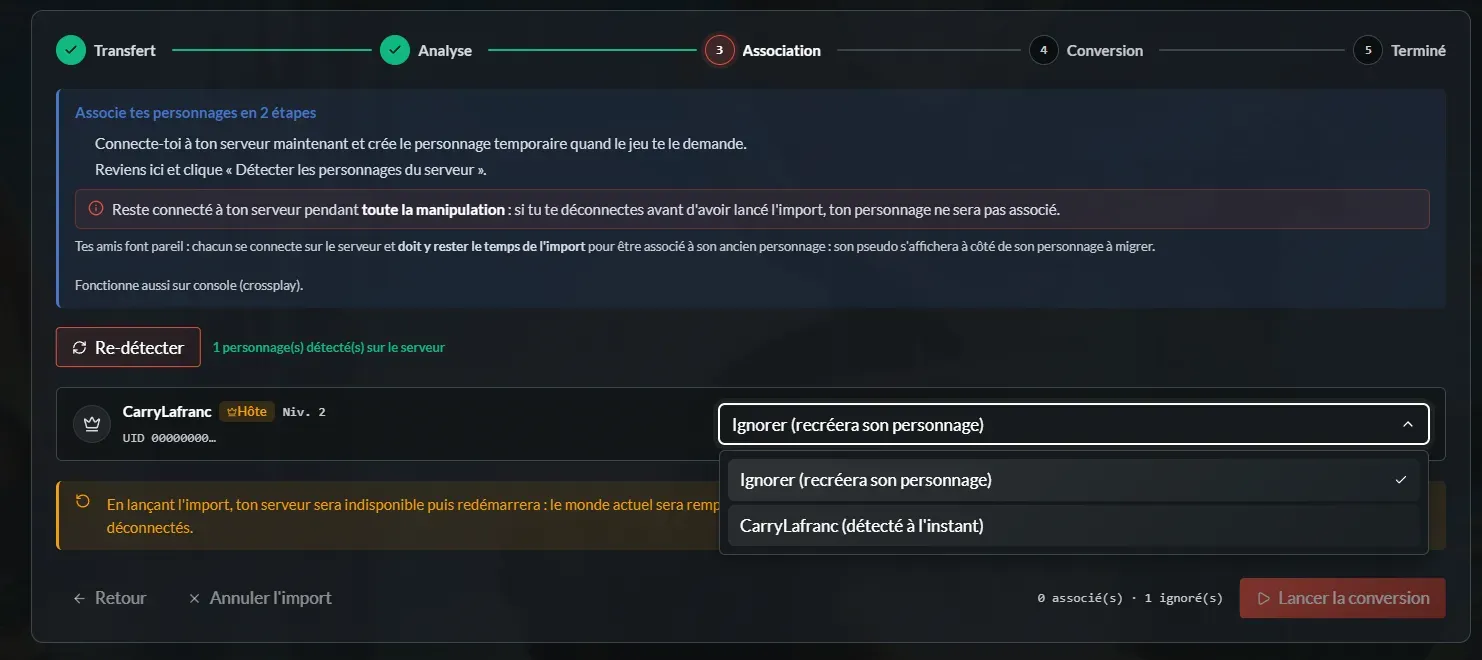
- associate the different characters from the save you're importing with the new ones you and your friends just created on the server.
In this case, since CarryLafranc was the only character in the save we imported, the choice was pretty quick! If you're importing a coop save though, take time to verify that each player is linked to the right character.
Warning! Stay connected to your server throughout the process: if you disconnect before launching the import, your character won't be associated.
Step 6: Launch the conversion
Once characters are associated, click on Launch conversion.
The tool then displays a confirmation before starting the import:
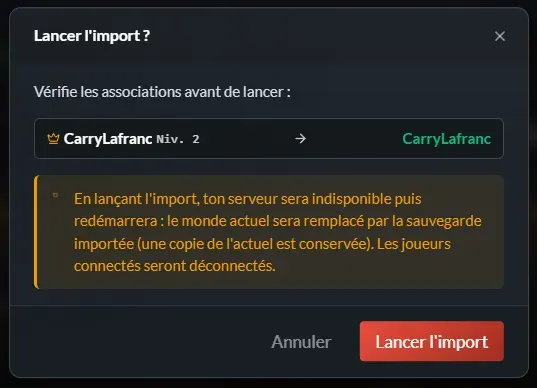
The tool will then prepare the save, convert data if necessary, import your world to the server, associate characters, and finally restart the server automatically.
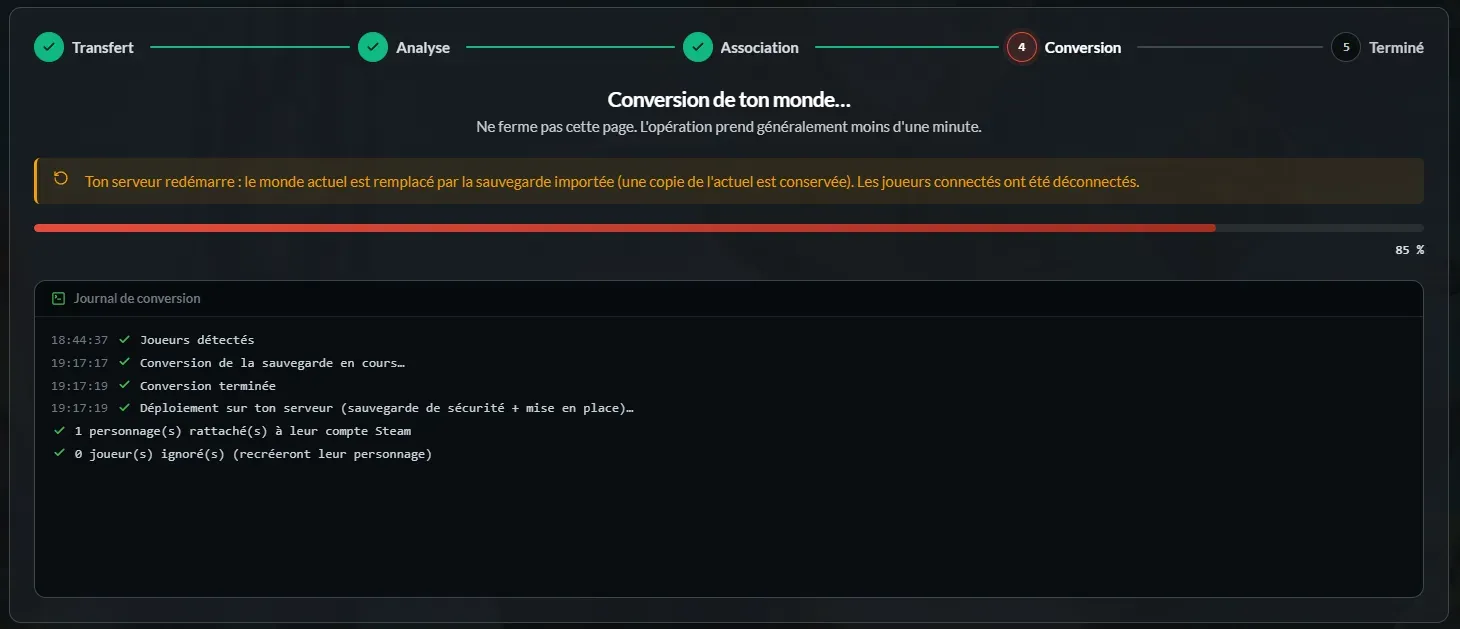
You don't need to stop the server manually: the tool handles it!
Step 7: Reconnect after restart
Once the conversion is complete, the tool notifies you immediately:
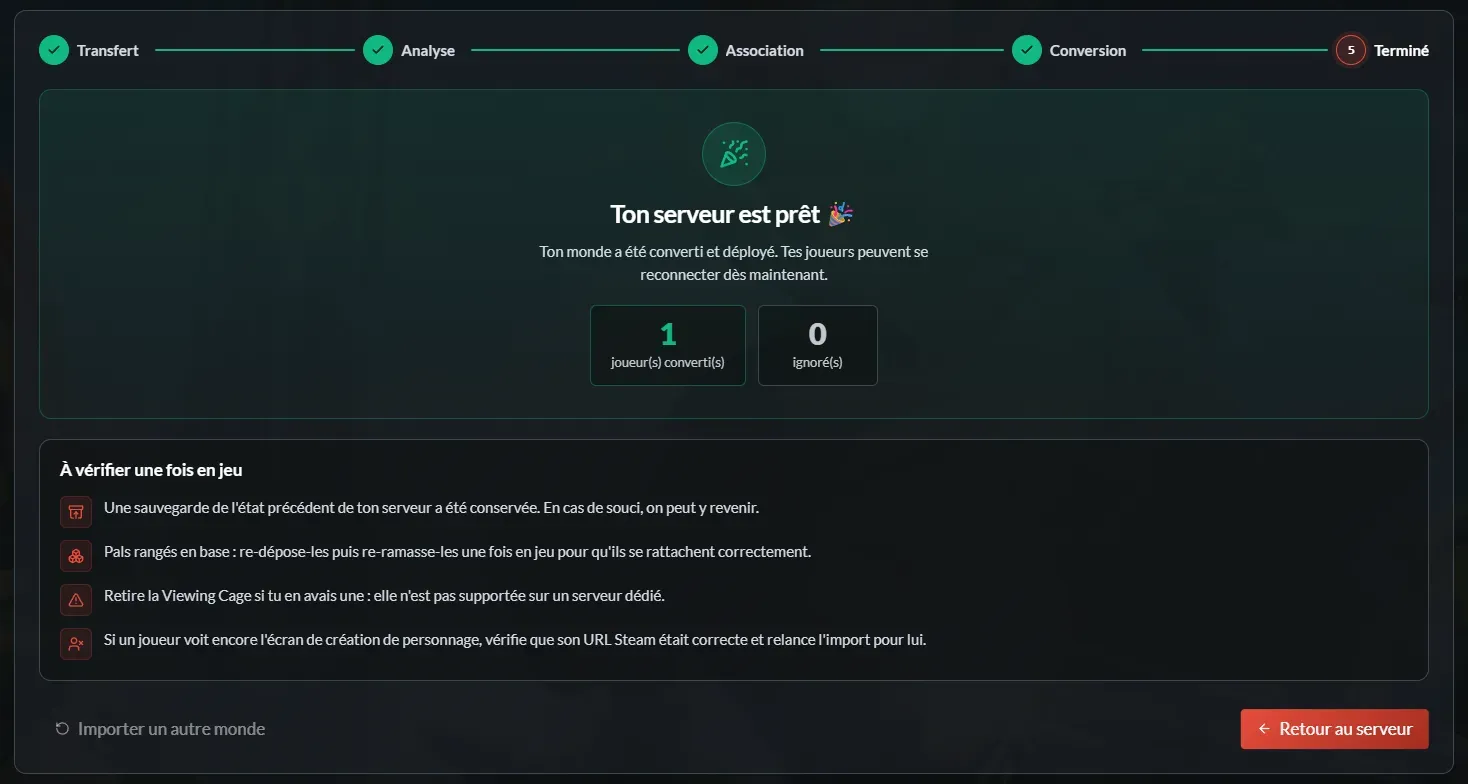
Since the server was restarted automatically, you'll have been disconnected from the game: that's normal, you just need to reconnect to your server to find your imported world.
Also remember to let your friends know, so they don't stay waiting in front of a connection screen like abandoned Pals ☝️🤓
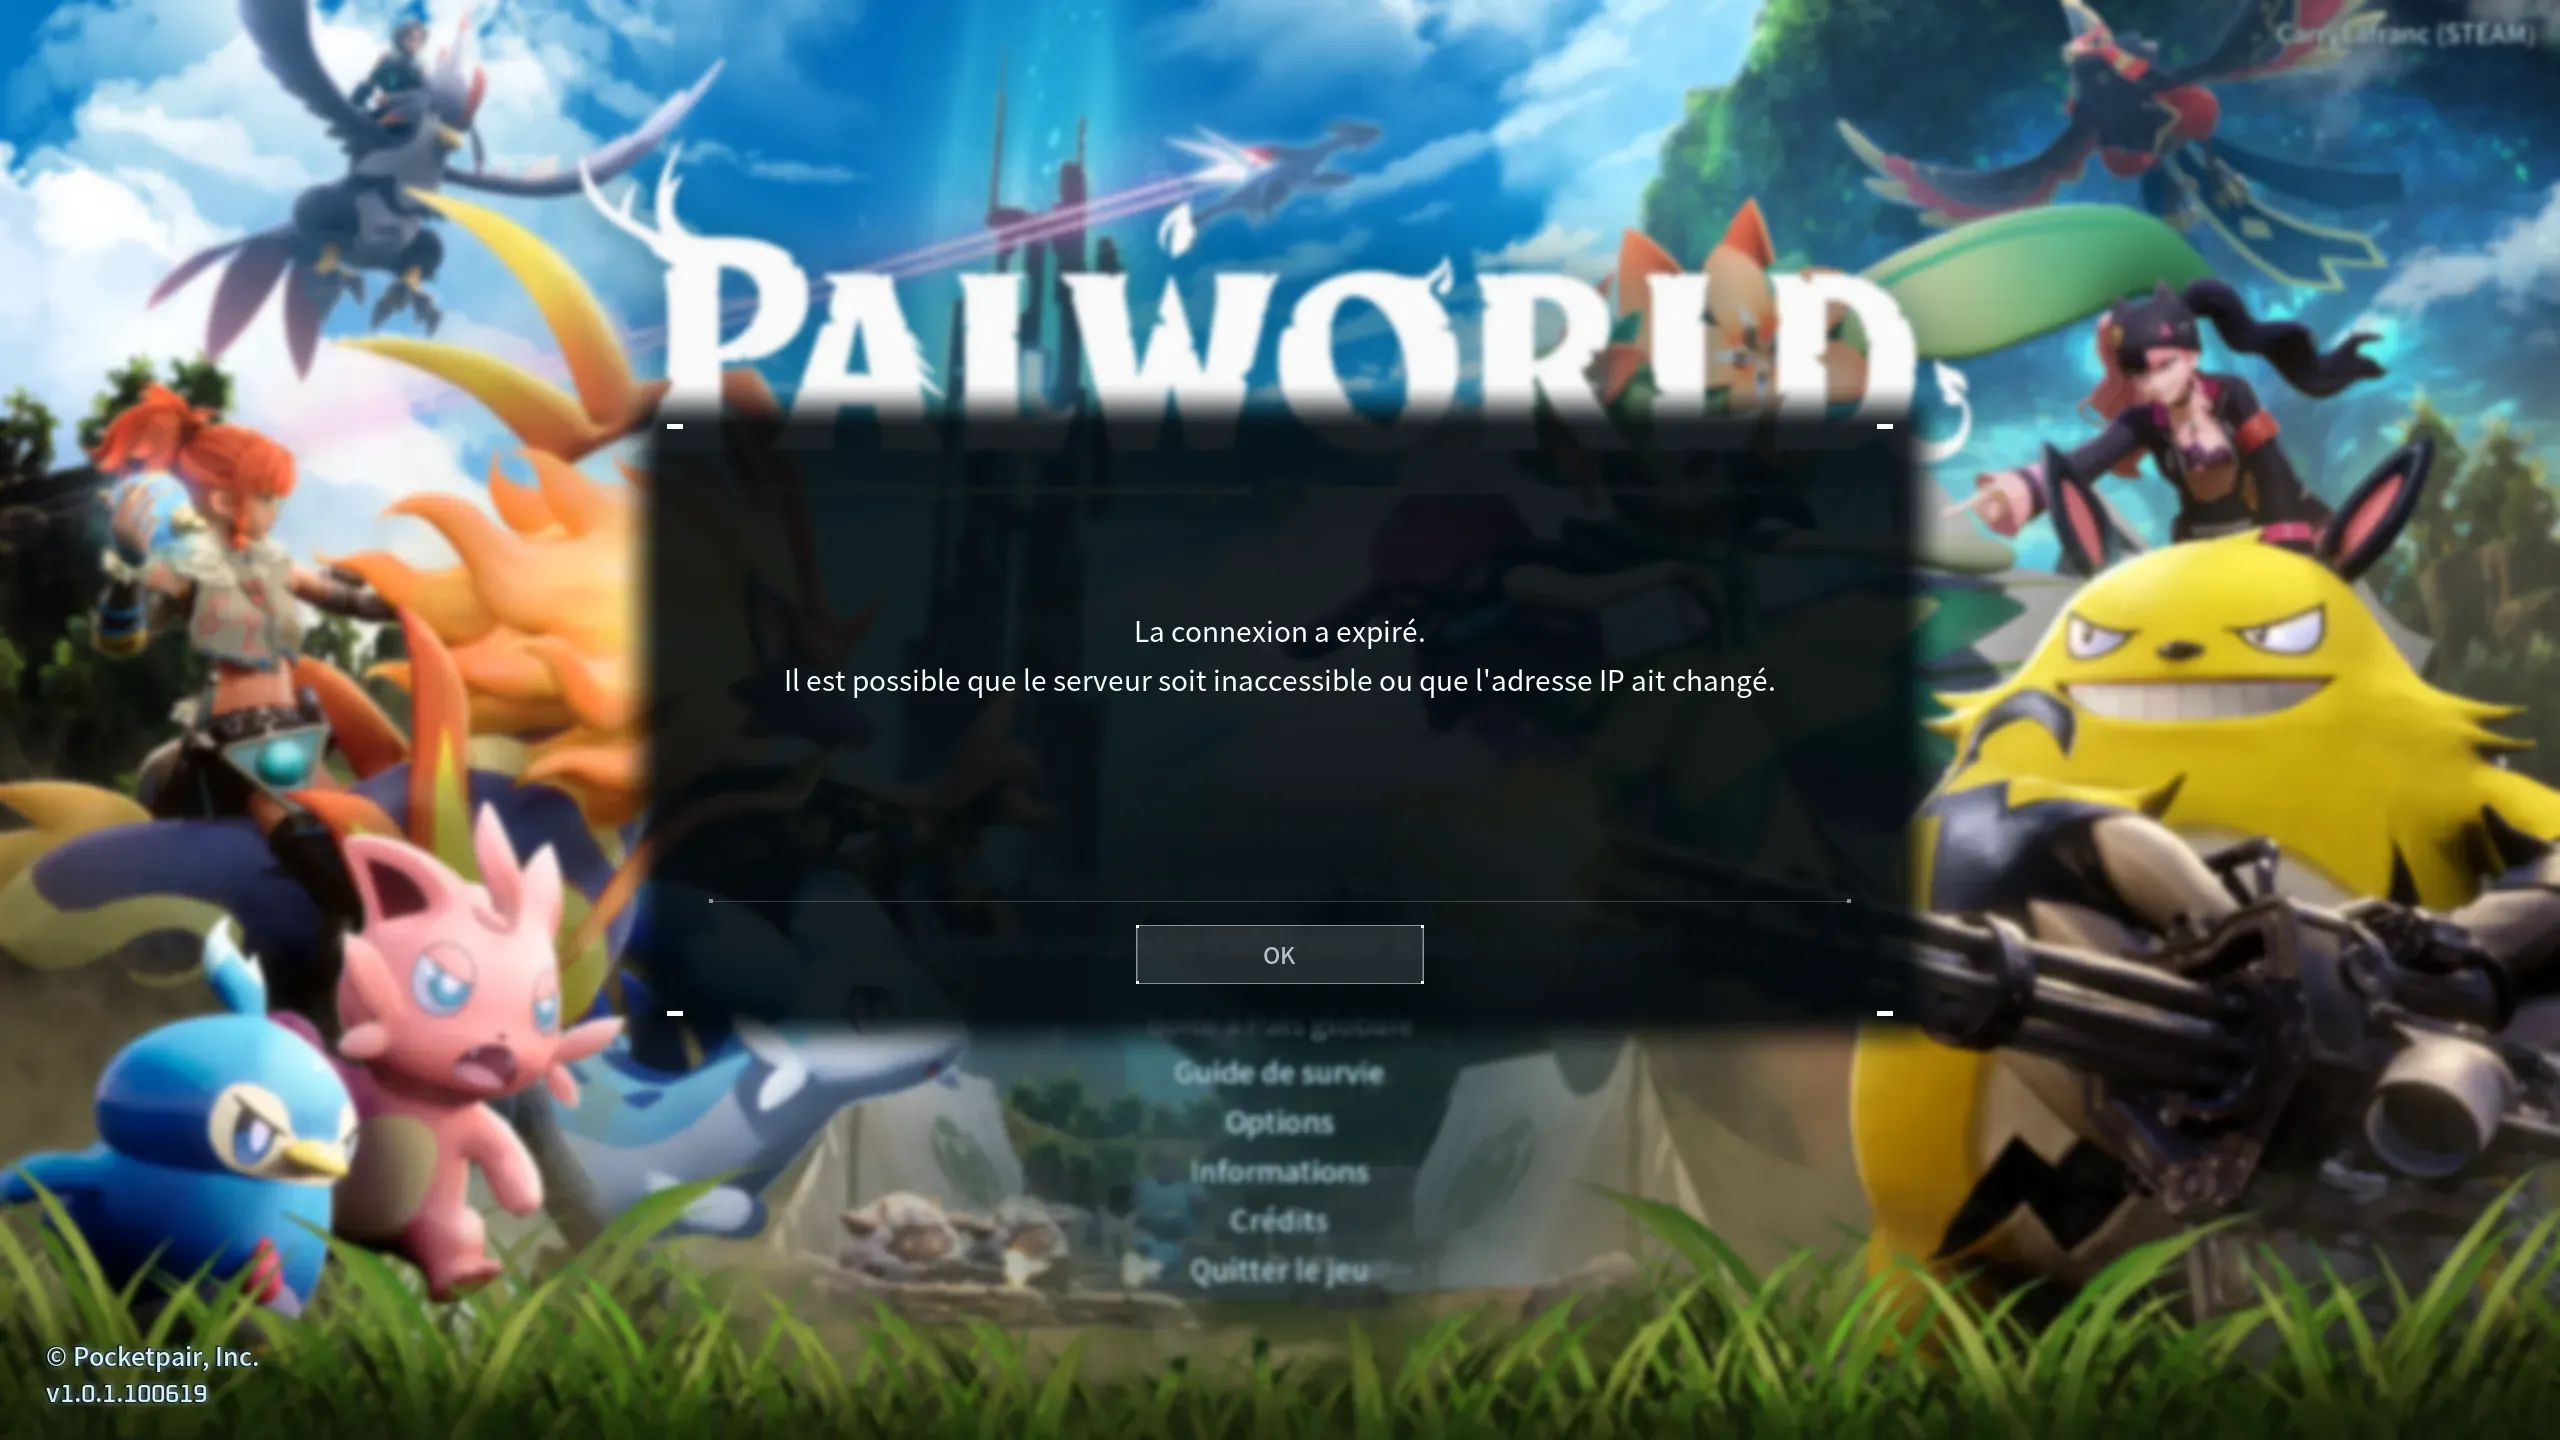
After import: points to check
Once connected, quickly verify that everything is in place:
- the loaded world is the right one;
- bases are present;
- chests are still there;
- guilds are correct;
- characters have recovered their progression;
- Pals are available;
- important server settings still suit you.
Thanks to our regular backups, we always keep backups of previous states of your server. If there's an issue, we can go back.
Some known points after import
Pals stored in base
If some Pals stored in base don't attach correctly, remove them and pick them up again once in-game. This usually allows them to attach properly to the server.
Viewing Cage
If you used a Viewing Cage in your old save, remove it. It's not supported on dedicated servers and can cause problems after import.
A player still sees the character creation screen
If a player still sees the character creation screen after import, their character probably wasn't associated correctly. In this case, verify that the correct Steam profile or player ID was associated with the right character, then relaunch the import for that player if necessary.
Will my old server configuration also be imported?
The tool mainly imports the world, characters, Pals and progression.
After import, remember to check your server settings from the nitroserv Manager, especially XP rate, difficulty, death penalty, incubation time, multipliers, guild rules, PvP, crossplay, password and server name.
If you're migrating from another dedicated server, you can manually reapply its settings from our configuration interface.
Common issues
The tool can't find my save
Verify that you've selected the right folder.
For a standard Steam save on Windows, open:
%LOCALAPPDATA%\Pal\Saved\SaveGames\
Then select the folder corresponding to your SteamID.
Don't select an empty folder, a parent folder that's too large, or a subfolder that doesn't contain the entire expected save.
Analysis fails
If analysis fails, verify that your save contains the necessary files (unfortunately your last tax return won't transform into a Lucky Pal)
A Palworld save generally contains files like:
Level.sav
LevelMeta.sav
Players/
If you're using a ZIP, also verify that the archive doesn't add an unnecessary folder above the save.
I don't see my character in the association
Connect to the server in-game, then click on Detect server characters in the tool.
Stay connected during association.
If you disconnect before launching the import, the tool may not associate your character correctly.
My old world doesn't appear after import
Verify that you imported the right folder or ZIP.
__
Need help?
If your old world doesn't load, if a character lost its progression or your server doesn't restart after import, we're available on our Discord or via our Twitter account!
You can also contact us directly via ticket from your manager.